-
Controlling Signals (2019)
-
 Introduction: 2-Wheeled Cart
 -
Brain Powered
-
 Check Your Understanding: Brain Powered
 -
 Upload Photo: Header Pin Wires
 -
Sending Signals
-
Check Your Understanding: Sending Signals
-
 Upload Video: Blinking Circuit using Arduino Uno
 -
Faster Blinking
-
Relays: High and Low Signals (Part 1)
-
Check Your Understanding: High and Low Signals (Part 1)
-
Relays: High and Low Signals (Part 2)
-
Check Your Understanding: High and Low Signals (Part 2)
-
Upload Video: Powering a Motor using a Relay
-
Motor Control Boards
-
Check Your Understanding: Motor Control Boards
-
Upload Video: Powering a Motor using a Motor Control Board
-
Project: 2-Wheeled Cart
-
Upload Video: 2-Wheeled Cart
-
Upload Block Diagram: 2-Wheeled Cart
-
Relays: High and Low Signals (Part 1)
Mini Project Powering a motor (Part 1)
In this project, the circuit will not work as expected! We will connect a motor to the Arduino Uno to see if we can make the motors move.
 Block Diagram: Motor connected to Arduino
Find the following components in your kit:
-
 Arduino Uno
-
 Arduino Software
-
 USB A-to-B cable
-
 Computer with USB port
-
 6V Motor with two leads

Connect the two leads of the motor to the Arduino Uno. The red lead should go to Port 13, and the black lead should go to GND.

Connect the Arduino to your computer using the USB A-to-B cable.
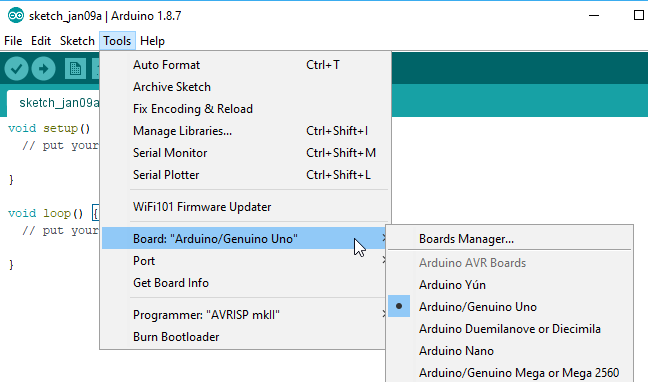
Open up the Arduino software, and go to the Tools menu and select Board < "Arduino/Genuino Uno". This lets the Arduino software know which Arduino board you are using (there are several types!).
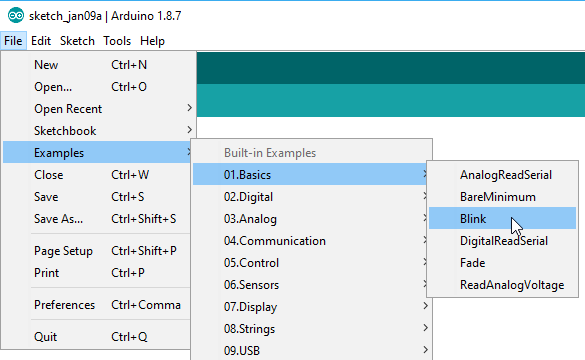
On the menu bar, select “Open”, and in “01. Basic”, select “Blink”.

Click on the Upload button to upload the “Blink” program to the Arduino Uno.
What happens?
Nothing. The motor does not move!
Explanation
The motor does not move in this circuit because there is not enough Voltage or Amperage (current) to power the 6 Volt motor. The Arudino is capable of producing 3.3V and 5V. The 5V is the max the Arduino is able to provide and it is unable to power this motor.

In the next lesson, we will use something called a Relay to get power from an outside source to power the motor.